No One will Reject Your Own Movie DVD Menu
Yesterday I was contacted by Belinda from Sothink and offered me an article about how to make the navigation menu on DVD video. I read the article first and I like it. Presented step by step in creating video DVD navigation menu with details. Then I post the article here because it would be useful.
The Tutorial
DIY has been hot because of its creativity and practicability. “Movie menu DIY”, you may few have heard of it. While, you may want to decorate baby growth record DVDs or just add your own design inspiration to the family travelling videos. Then, it acts. We are so excited to be sharing a super interesting DIY guide for DVD menus, including background images, audio, page buttons etc. In this guide, you will learn:
Part I: Preparation for Movie Menu DIY
Part II: How to DIY Movie Menu
Part III: Add DIY Movie Menu to the Program
Part IV: Movie menu displayed on TV

Part I: Preparation for Movie Menu DIY
Movie menus add splendor to the DVD discs and they can be used as navigation for videos. Family photos, romantic or cozy background audio, and decorative button border added to the memorable DVDs, could it be the better gift for family reunion, lovers dating or the birthday of daughter? Now, let’s switch to the DIY process. We use Sothink DVD Movie Maker to DIY movie menu. It is necessary to introduce the movie menu components (Take the “Violet Frame” as an example).

Table 1: Movie Menu Components
| “My DVD” | The default menu title text which can be edited in xml file. |
| “Background.jpg” | The background picture of the menu. |
| “Background.mp3” | The background audio of the menu. |
 |
The black part (0x000000) is the display area for button background image. |
 |
Button highlight (*.wmf). Be highlighted when mouse moves over. |
  |
The background vector of pageup and pagedown (*.png). |
| The pageup and pagedown button highlight (*.wmf). Be highlighted when mouse moves over. |
Almost all of the components can be DIY in this movie menu, including background image, title, background audio, video button (background, button border, highlight, text), page button (background, highlight) and xml file. However, you can get your own template through changing part of the existing resources, such as background image, audio, button text etc. The resources needed to be prepared are shown as follows:
Table 2: The Resources Needed
| Background image | jpg or png; size:720×480 | |
| Background audio | mp3/wma/wav; 15 seconds — 180 seconds long audio recommended | |
| video.png | Button border | |
| prev.png | Pageup button background picture | |
| next.png | Pagedown button background picture | |
| video.wmf | Button highlight | The consistent color is recommended to be used in these three pictures |
| prev.wmf | Pageup button highlight | |
| next.wmf | Pagedown button highlight | |
| template.xml | Copying the existing template.xml file is recommended | |
Note: All the resources name should be consistent with the existing resources (For instance, the designed background image can only be called “background.jpg”, the button border should be called “video.png” etc).
Photoshop is recommended to design the background images, button border and background of page buttons. The page button highlight can be made with Sothink SWF Quiker and the output should be WMF format. We recommend using the same color when you make the highlight of the page buttons. All of the resources should be placed in the same folder (For example, “Happy Family”). And this folder should be put in the directory “…SourceTec\Sothink Movie DVD Maker\Templates”. For instance, “D:\Program Files\SourceTec\Sothink Movie DVD Maker\Templates”.
Part II: How to DIY Movie Menu
The most exciting part comes. After all the preparation work finishes, it is time for free DIY. The new menu template named “Happy Family” has been added and all components that are mentioned in Tab.2 are in the wings.
Most of works can be done within xml file, and the new added xml file is attached for references (Take the new added “Happy Family” as an example):
<?xml version=”1.0″ encoding=”utf-8″?>
<menu id=”menu” name=”Happy Family” background_image=”background.jpg” background_audio=”background.mp3″ title_text=”Family Love” title_font=”Arial” title_font_size=”55″ title_color=”$0d4600″ title_x=”350″ title_y=”42″ duration=”30″>
<buttons id=”buttons” text_align=”center” text_color=”$0d4600″ font=”Arial” font_size=”14″ >
<button x0=”261″ y0=”100″ w0=”158″ h0=”119″
x1=”261″ y1=”100″ w1=”158″ h1=”119″
x2=”266″ y2=”106″ w2=”146″ h2=”107″
x3=”261″ y3=”220″ w3=”155″ h3=”15″/>
<button x0=”491″ y0=”100″ w0=”158″ h0=”119″
x1=”491″ y1=”100″ w1=”158″ h1=”119″
x2=”496″ y2=”106″ w2=”146″ h2=”107″
x3=”491″ y3=”220″ w3=”155″ h3=”15″/>
<button x0=”261″ y0=”260″ w0=”158″ h0=”119″
x1=”261″ y1=”260″ w1=”158″ h1=”119″
x2=”266″ y2=”266″ w2=”146″ h2=”107″
x3=”261″ y3=”380″ w3=”155″ h3=”15″/>
<button x0=”491″ y0=”260″ w0=”158″ h0=”119″
x1=”491″ y1=”260″ w1=”158″ h1=”119″
x2=”496″ y2=”266″ w2=”146″ h2=”107″
x3=”491″ y3=”380″ w3=”155″ h3=”15″/>
<button x0=”485″ y0=”410″ w0=”35″ h0=”38″
x2=”487″ y2=”408″ w2=”32″ h2=”36″/>
<button x0=”610″ y0=”410″ w0=”35″ h0=”38″
x2=”612″ y2=”408″ w2=”32″ h2=”36″/>
</buttons>
</menu>
Note: The button properties are arranged according to the video button orders (from left to right, from top to bottom). The last two button properties are the pagebutton properties.
Let’s specify the menu template and other properties (Table 3 until 5).
Table 3: Menu Template Properties
| Menu Template Properties | Illustration | |
| id=”menu“ | name | Menu id (modification not recommended); Menu name should be the same with the folder name) |
| background_image | background_audio | The directory for background images and background audios |
| title_text | title_font | Menu title, font, font size, color, and the position (“x” and “y” are used to define the position of menu) |
| title_font_size | title_color | |
| title_x | title_y | |
| duration | Menu play time for one time[15,180] | |
Table 4: Menu Button Properties
| Button Properties | Illustration | |
| id=”buttons“ | Button id (modification not recommended) | |
| font | font_size | Button text, text size, color, align method (left/center/right? |
| text_color | text_align | |
Table 5: Button Coordinate Properties
| Button Coordinate | Illustration |
| x0 y0 w0 h0 | Coordinate, width and height of button background image/page button. |
| x1 y1 w1 h1 | Coordinate, width and height of button border?video.png?. Not applicable for page buttons. |
| x2 y2 w2 h2 | Coordinate, width and height of button highlight (video.wmf/prev.wmf/next.wmf?. The values of the width and height represent the actual size of the pictures. |
| x3 y3 w3 h3 | Coordinate, width and height of button texts. Not applicable for page buttons. |
Some useful tips you may need during the DIY:
1. Unsatisfied with the menu title, including text, text size, display position, color etc.
In this case, you can make some changes to the menu title properties:
title_text=”Family Love” title_font=”Arial” title_font_size=”55″ title_color=”$0d4600″ title_x=”350″ title_y=”42″ duration=”30″>
For instance, you may change the text from “My DVD” to “Family Love”, size to “55”, the coordinate “x” value to “350”.
2. The mal-alinement of video buttons
In this case, users just need to change the X values. For instance, the menu has four video buttons, two at each line. The third and fourth buttons are not aligned with the first and second buttons, and then users need to change the X values (x0—x3) of the first and second video button properties.
<button x0=”261″ y0=”100″ w0=”158″ h0=”119″
x1=”261″ y1=”100″ w1=”158″ h1=”119″
x2=”266″ y2=”106″ w2=”146″ h2=”107″
x3=”261″ y3=”220″ w3=”155″ h3=”15″/>
For instance, you may change the first button X properties value to “261”, “261”, ”266”, ”261” and the second button properties value to “491”, “491”, “496”, “491” to be consistent with the third and fourth button X properties respectively.

3. The new added menu template can’t be found in the program.
For this issue, Part Three Tutorial (“Add DIY Movie Menu to the Program”) will help you out.
When you have learnt how to DIY the template.xml, then you have at least half done. In the next tutorial, you will learn how to add the DIY menu to the program.
Part III: Add DIY Movie Menu to the Program
Then, you have learned how to DIY movie menu, while, there may be still a question to add the new menu to the program. The DIY movie menu can be added to Sothink Movie DVD Maker program for reuse. As we have mentioned in the article, you should create a folder for resources (eg.“Happy Family”). Then save this folder in the folder named “Templates”(For example: “D:\Program Files\SourceTec\Sothink Movie DVD Maker\Templates”).

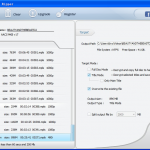
Restart the program, and click “Add Files” to add the video files. Click the drop down arrow of the templates and select “Happy Family”:

If the new added menu templates can’t be found in this drop down menu, there may be some problem with the menu name in the template.xml.
<menu id=”menu” name=”Happy Family” background_image=”background.jpg” background_audio=”background.mp3″
The menu name should be consistent with the folder name. After all changes have been done, you need to restart the program.
Besides, button texts can be added to the video buttons. The text can be the video name or any name that can be defined. Just click the video you want to add texts. Then choose “Font” and “Button text” to set the text font and texts.
This is what the finished menu should look like:
Isn’t it simple? Sometimes, “make a change” just needs minutes. Movie menus can be viewed on TV for clearer vision. The next tutorial will show the movie menus displayed on TV.
Part IV: Movie menu displayed on TV
The last step finally comes. You must be really looking forward to the forthcoming of the masterpiece. Just like enjoying dinner in a restaurant, you need to have a look at the menu. It is the same with movie menu. Before you decide which movie to watch, you need to browse them. Sothink’s Free Movie Maker provides fast speed for converting/burning all video formats to DVD. Then you can appreciate the masterpiece on TV with the help of a DVD player and switch to another as quickly as using your remote controller. You can also use Sothink’s Free Video Converter to convert the video formats.

Have you mastered all the steps of the movie menu DIY? If yes, congratulation! In case you are still in doubt about how to DIY movie menu, please write to us via support@sothinkmedia.com.
Related Topics

Sothink DVD Ripper: fast and easy to ripping DVD movie [GIVEAWAY]
BDLot Blu-ray Ripper: guaranteed without quality loss [Giveaway]

Premiere Pro Crashing? Here’s Why and How to Make it Stop (Mac)

CollageIt: make collage photo with easy [GIVEAWAY]
